> For the complete documentation index, see [llms.txt](https://docs.zata.ai/llms.txt). Markdown versions of documentation pages are available by appending `.md` to page URLs; this page is available as [Markdown](https://docs.zata.ai/manage/bucket/bucket-policy-configuration.md).
# Bucket Policy Configuration
Bucket Policy is used to manage access control for a bucket by defining who can access it and what actions they can perform. It allows secure and fine-grained permission management without changing the bucket’s public visibility. By creating a bucket policy, specific users or the public can be granted limited access such as read-only or download permissions. This ensures better security and controlled usage of object storage resources.
### Creating an Access Policy
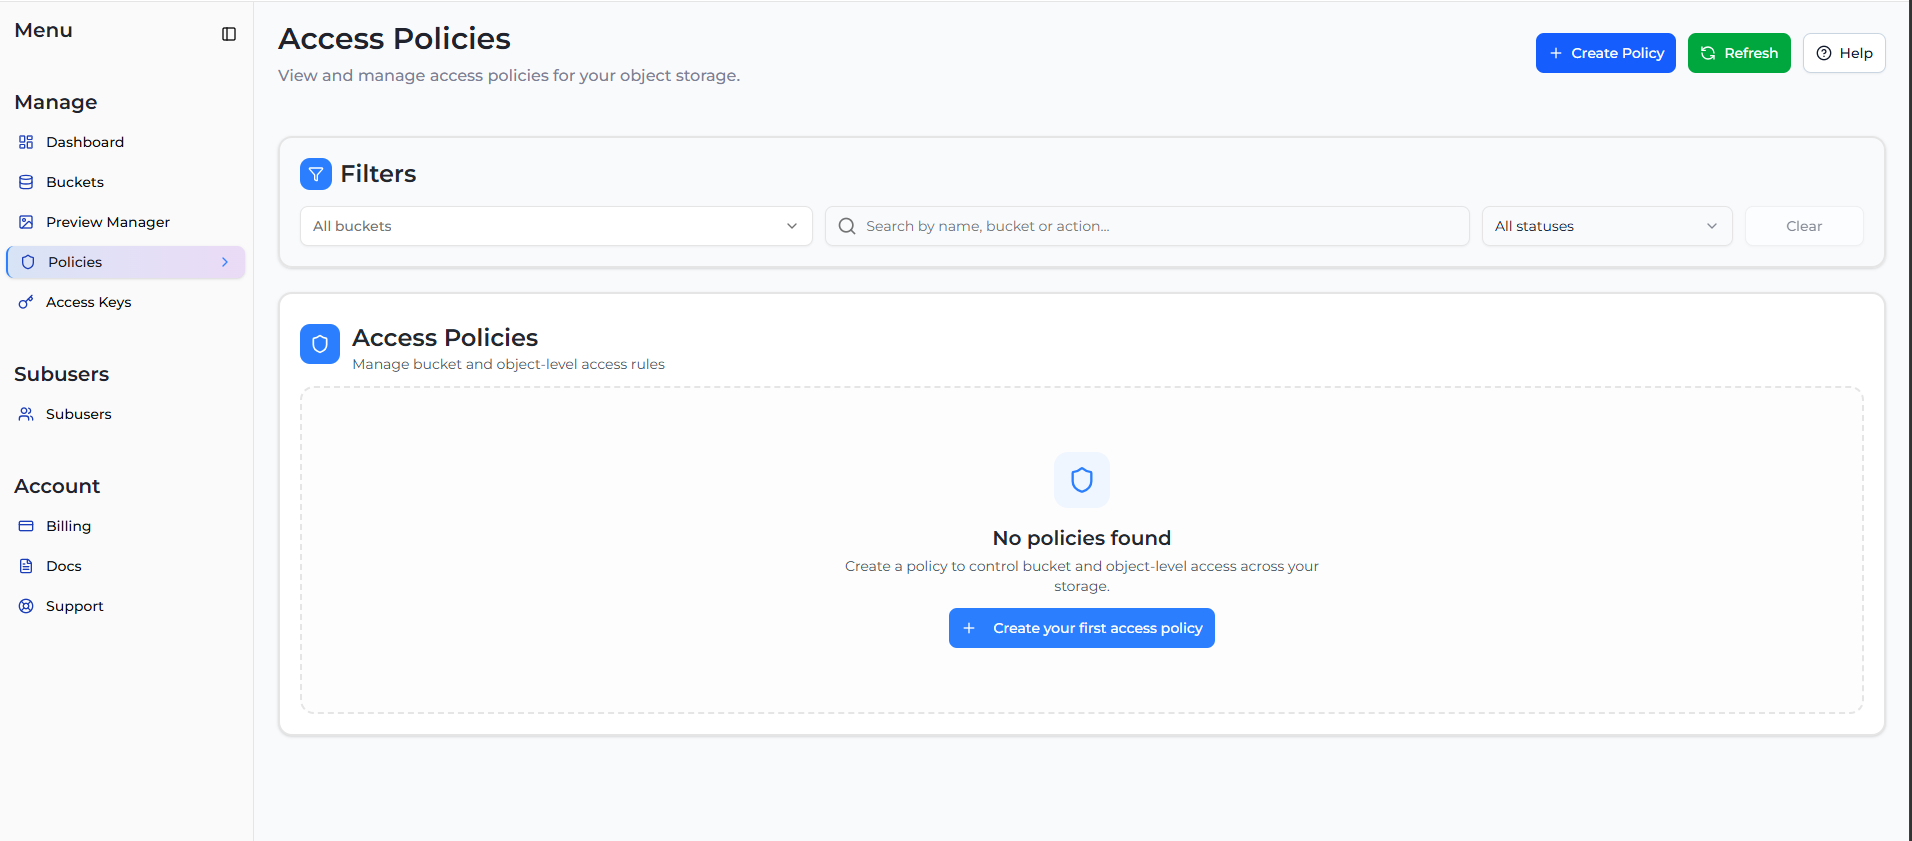
1. From the left sidebar menu, navigate to **Policies**.
2. Click on the **+ Create Policy** button.
The policy creation process follows a simple 4-step wizard:
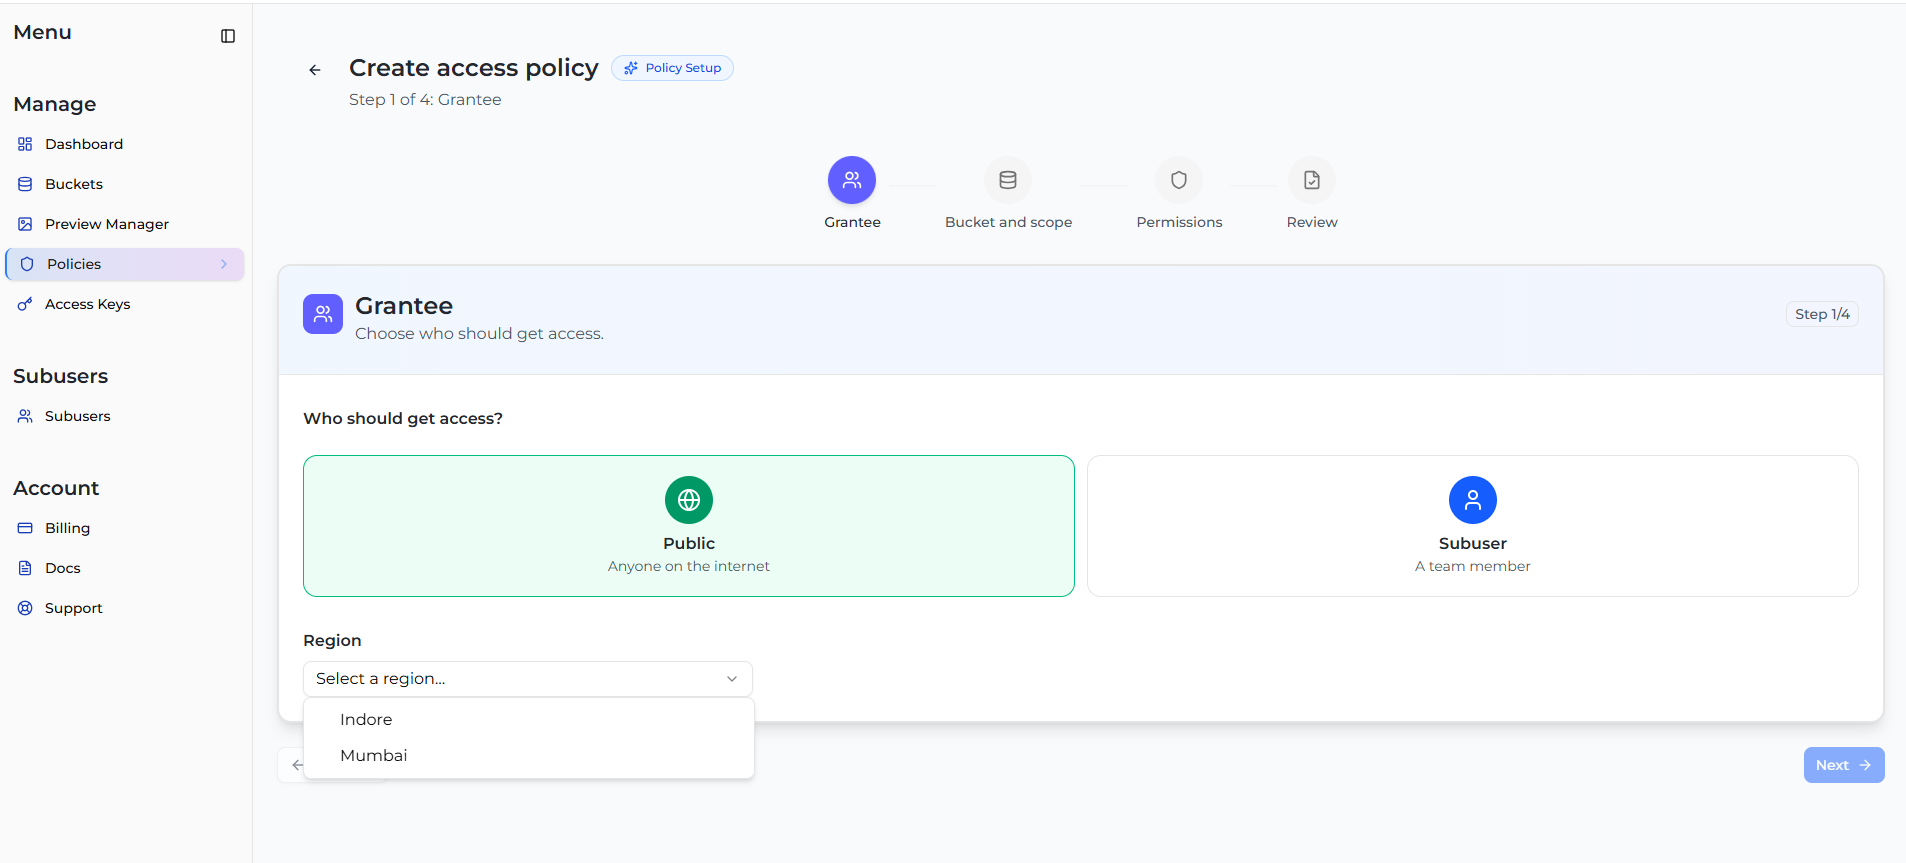
#### Step 1: Grantee
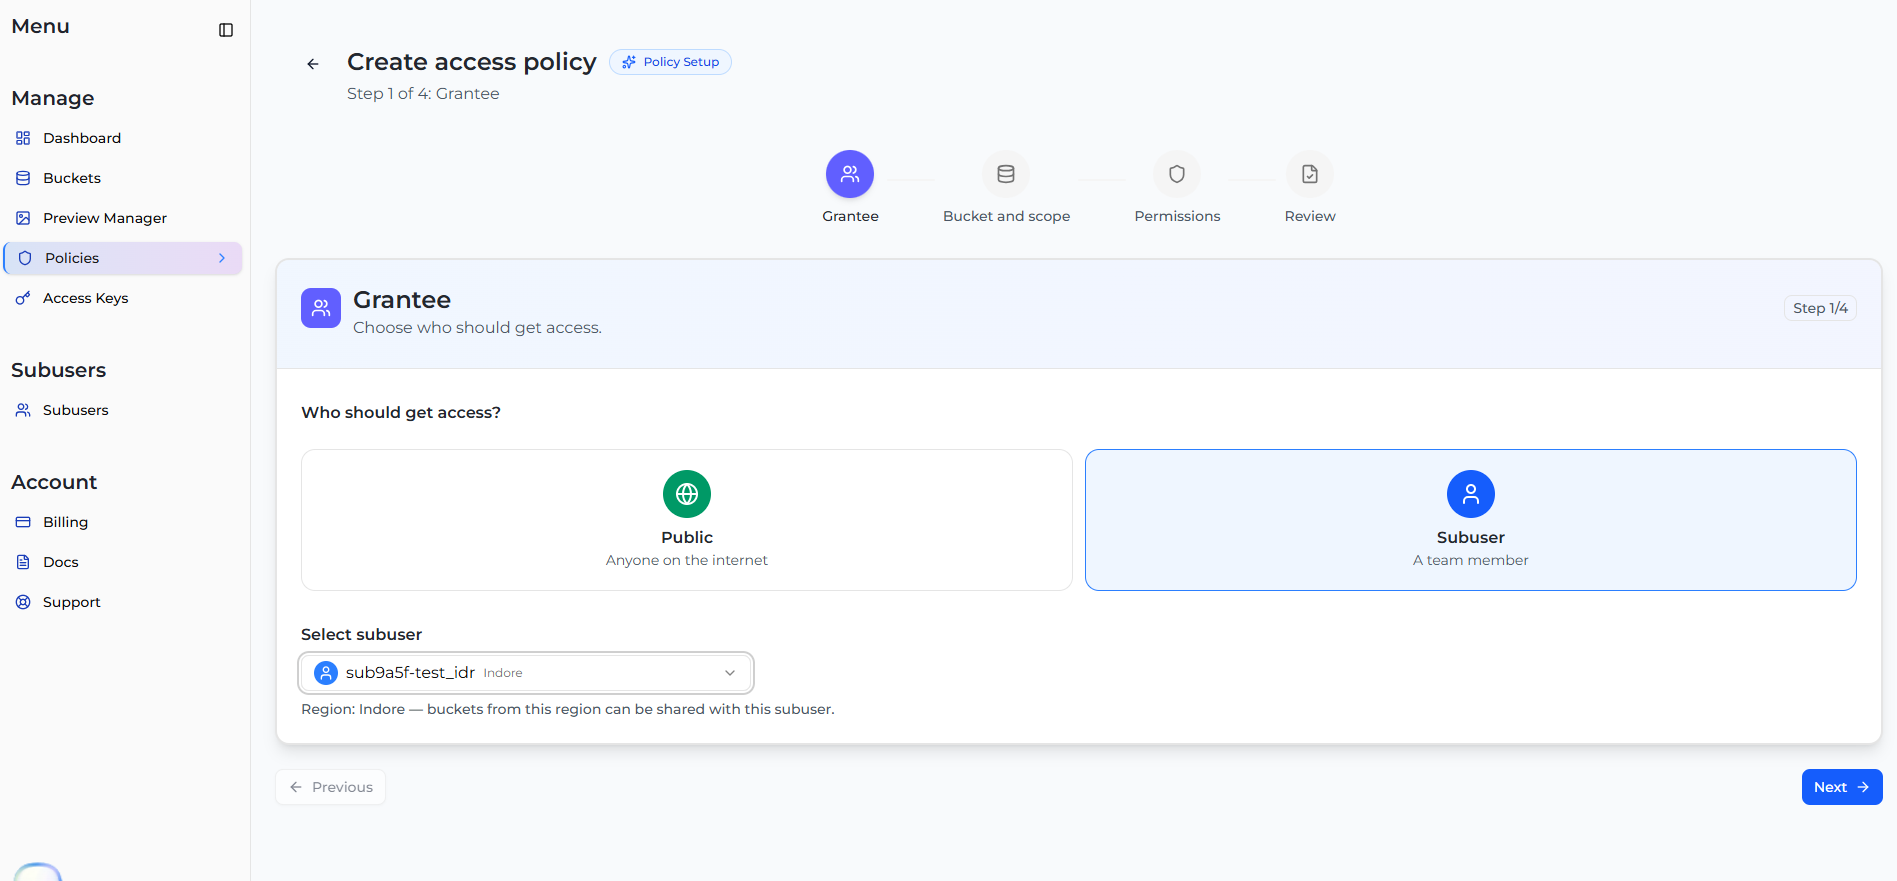
Choose who should get access to your bucket. You can grant access to:
* **Public**: Anyone on the internet.
* **Subuser**: A specific team member.
After selecting the grantee, choose the **Region** from the dropdown menu and select the specific subuser if applicable.
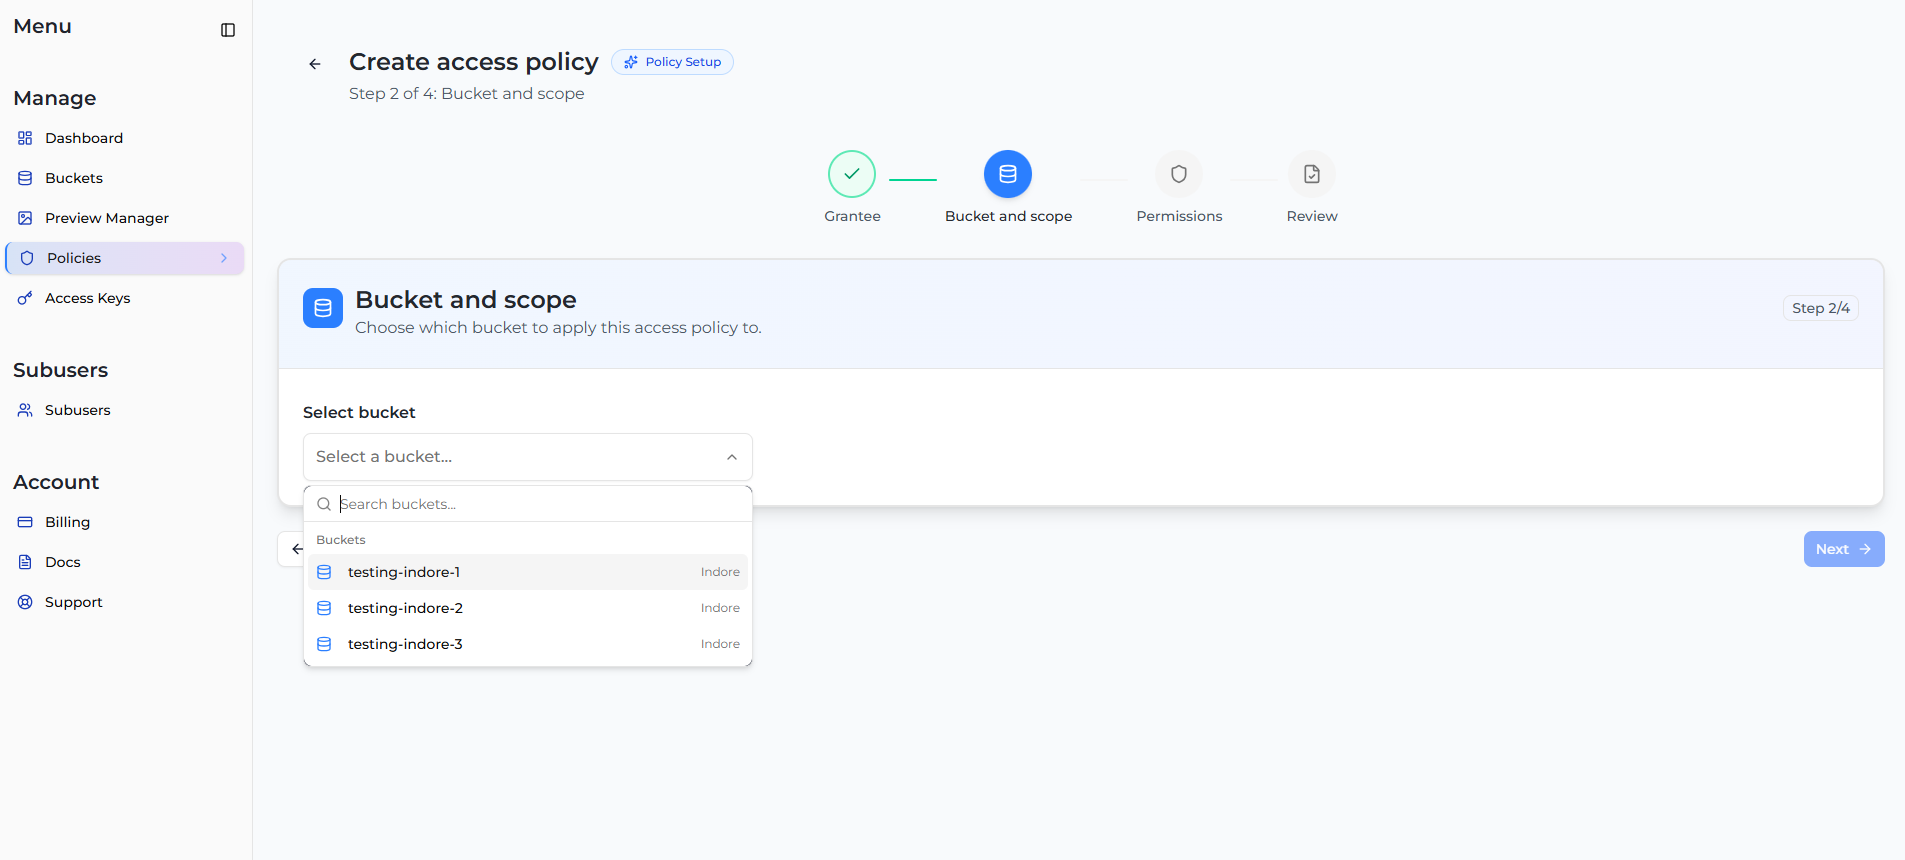
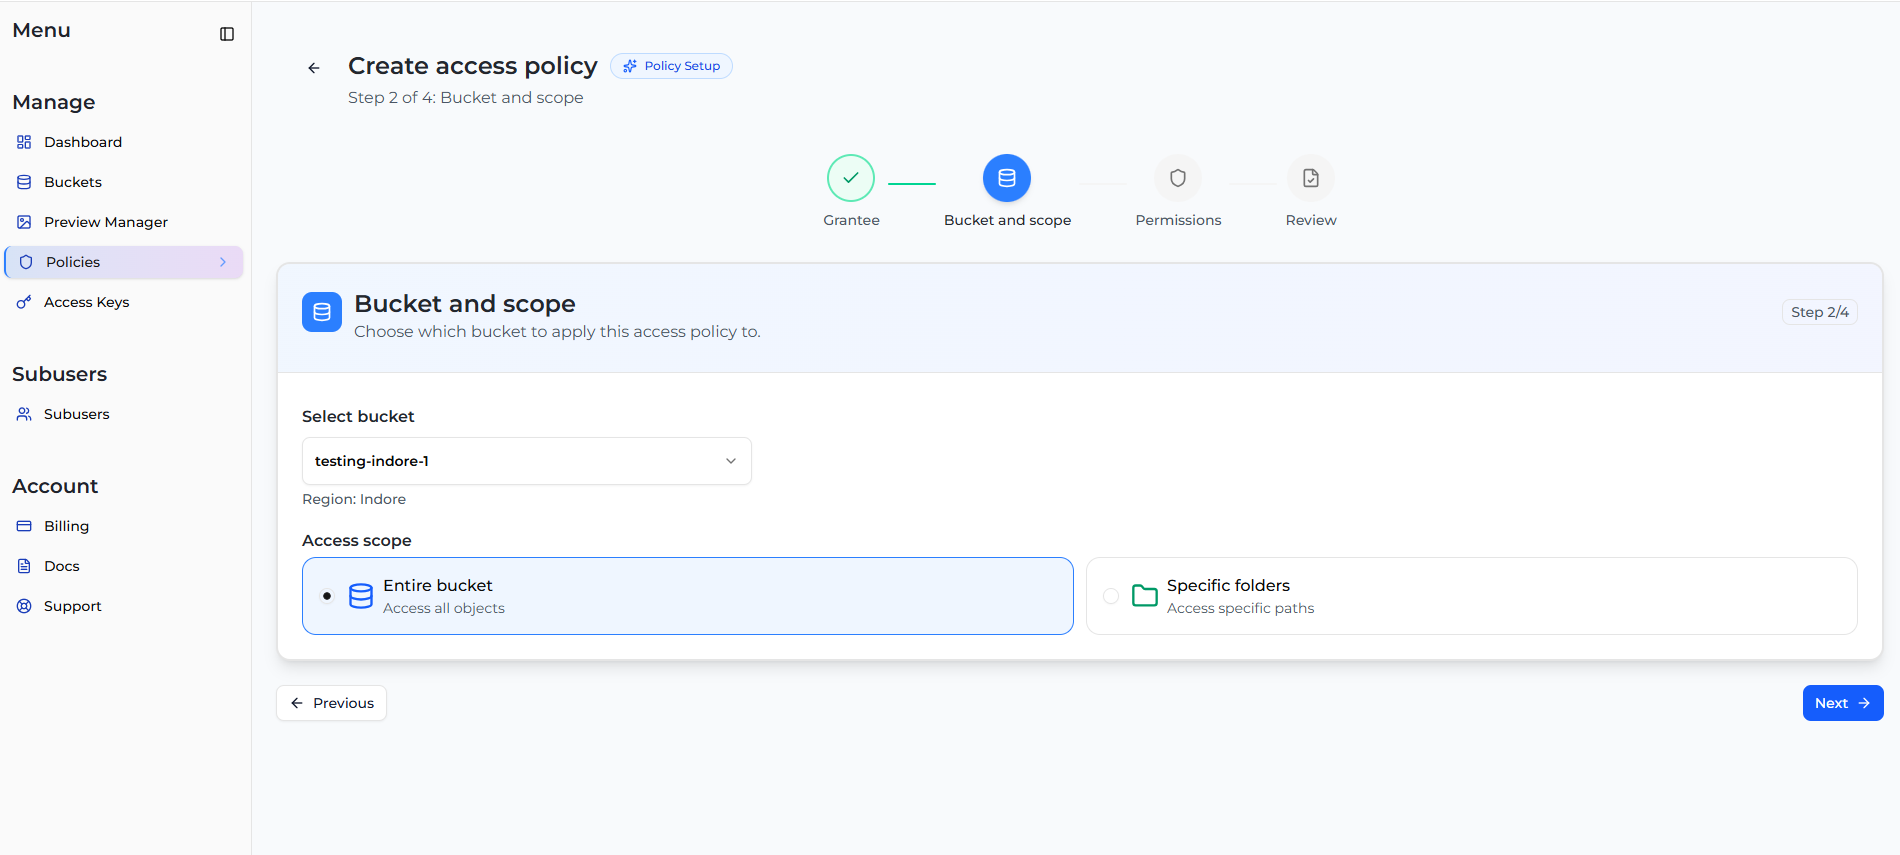
#### Step 2: Bucket and scope
Select the specific bucket you want to apply this access policy to.
Next, define the **Access scope**:
* **Entire bucket**: Access all objects within the selected bucket.
* **Specific folders**: Restrict access to specific paths within the bucket.
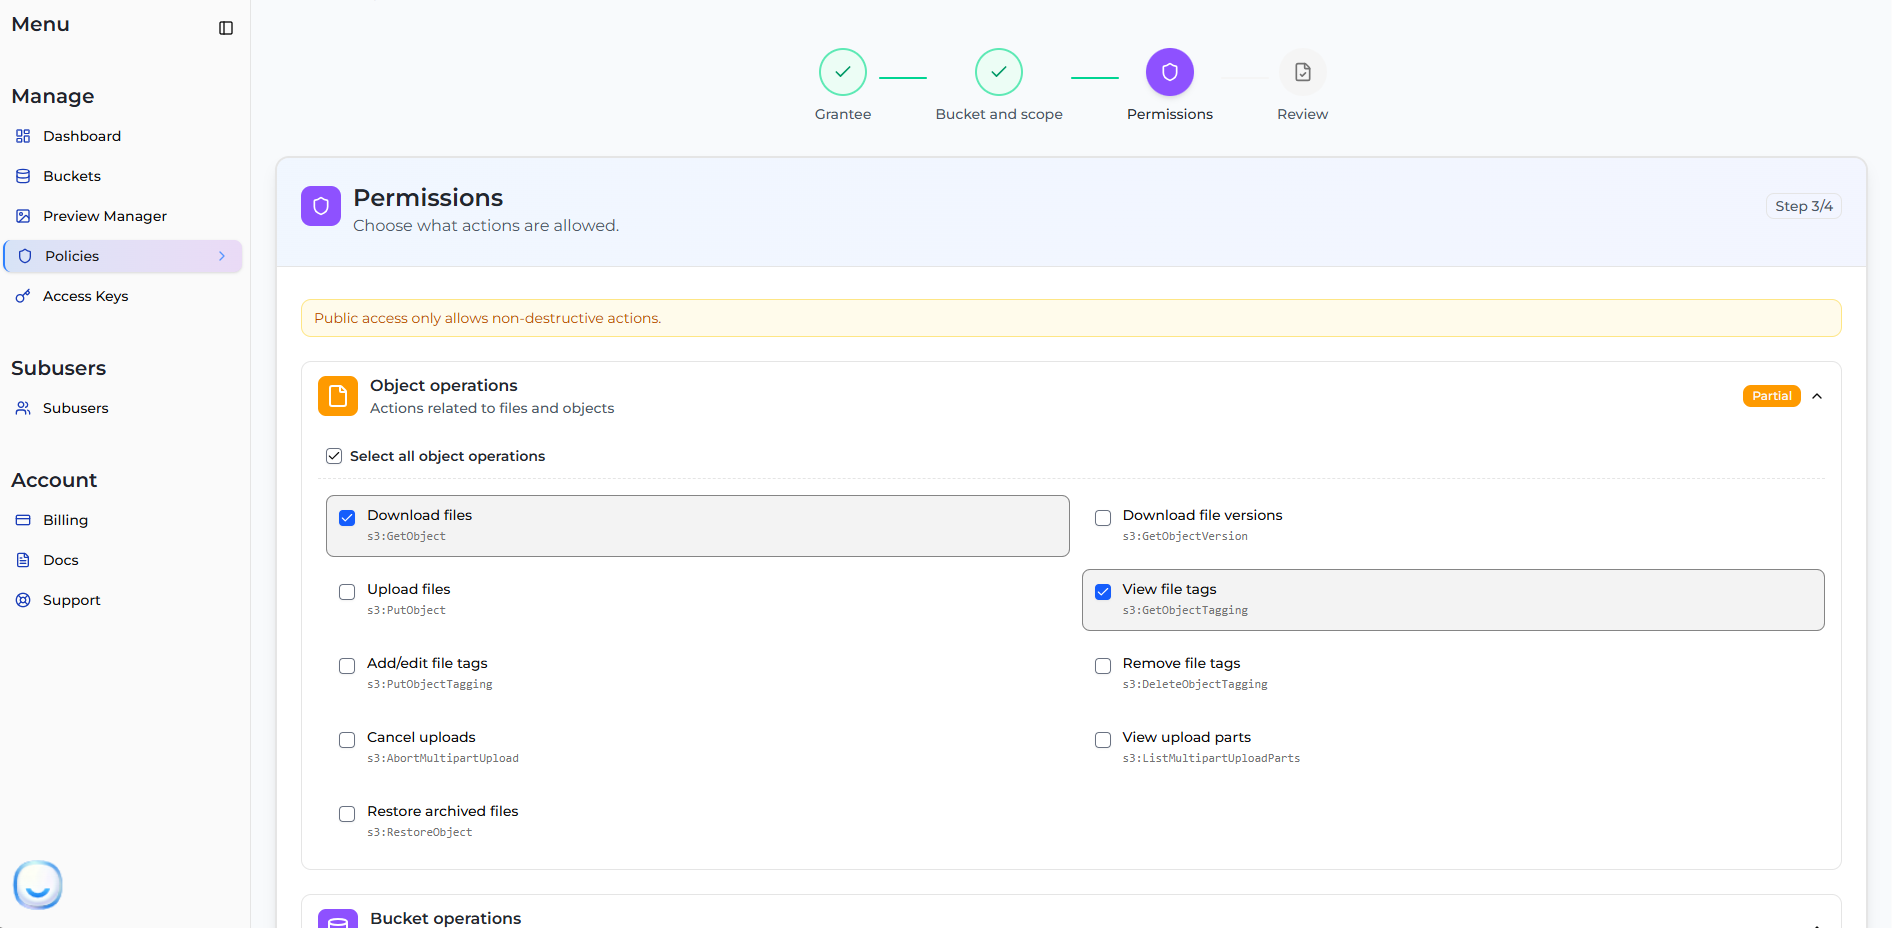
#### Step 3: Permissions
Choose the specific actions that are allowed or denied for the grantee. You can select individual Object operations (e.g., Download files, View file tags) or Bucket operations.
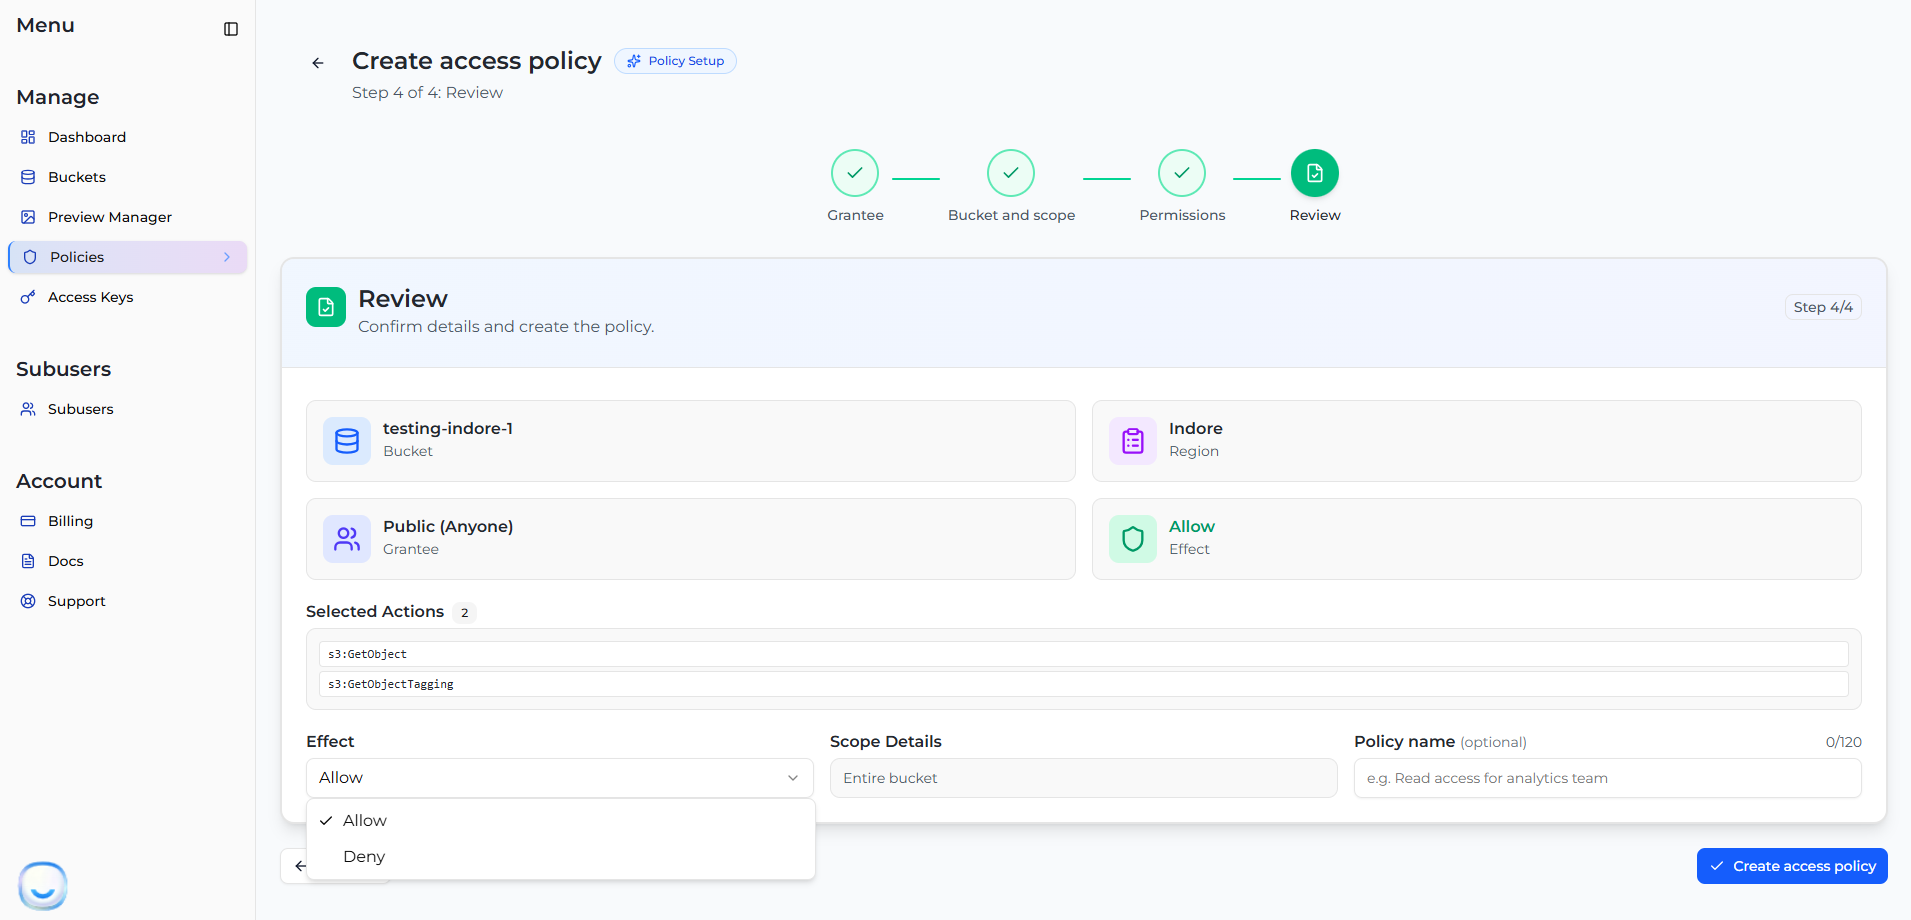
#### Step 4: Review
Review the details of your policy setup, including the Grantee, Bucket, and Permissions.
* Select the **Effect**: Choose `Allow` to grant the permissions or `Deny` to explicitly restrict them.
* (Optional) Enter a **Policy name** for easier identification later.
Click **Create access policy** to finalize and apply the rules.
### Managing Policies
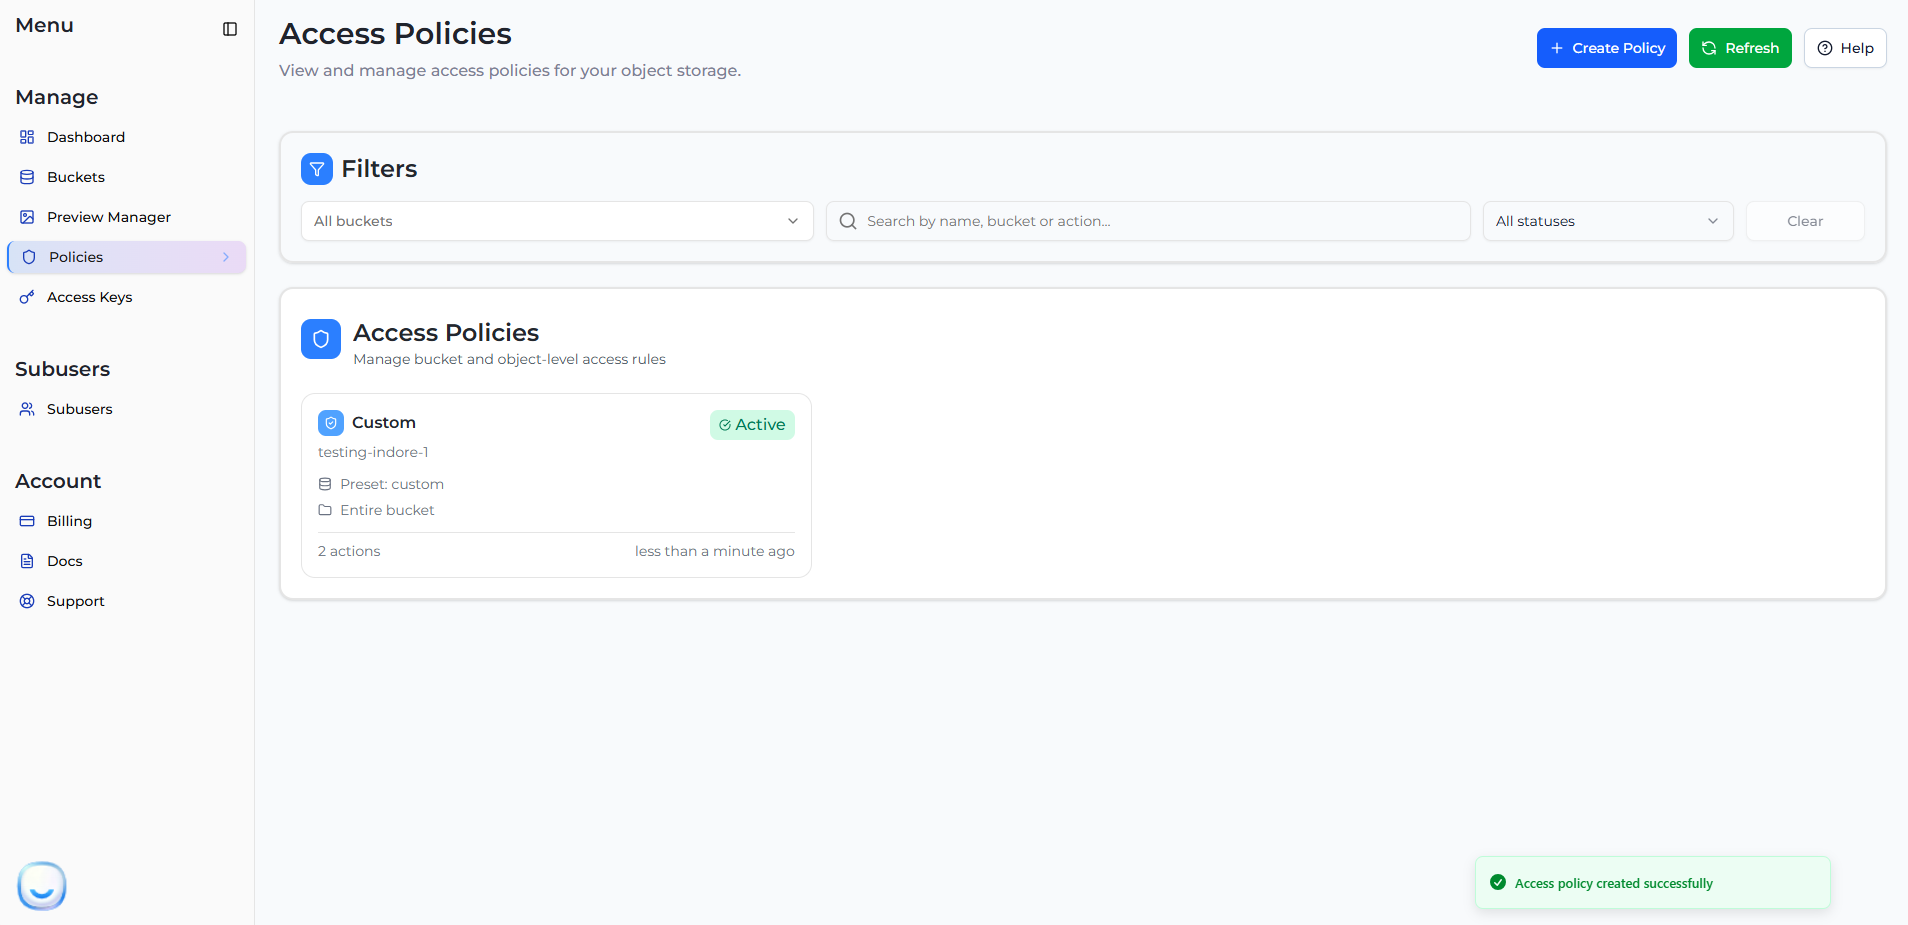
After successful creation, your new policy will appear in the Access Policies list. From here, you can view, edit, or delete existing policies.
**Delete a Bucket policy:** To delete a policy, navigate to the **Policies** section, locate the policy you want to remove, and select the delete option from the actions menu. This removes all custom access rules defined in that policy.