> For the complete documentation index, see [llms.txt](https://docs.zata.ai/llms.txt). Markdown versions of documentation pages are available by appending `.md` to page URLs; this page is available as [Markdown](https://docs.zata.ai/knowledgebase/connect-bucket-with-cyberduck.md).
# Connect Bucket with Cyberduck
Cyberduck is a free and open-source application designed for file transfer and cloud storage management. it simplifies the process of connecting your local computer to remote servers or cloud storage services.
[Embedded Link](https://youtu.be/GgBAAkjVFWI)
## Prerequisites
To download the **Cyberduck** and installation follow these [links](https://cyberduck.io/download/).
Zata.ai Bucket - [Bucket Create Guide](https://docs.zata.ai/manage/bucket/create-bucket).
Access and Secret Key Pair - [Access Key Guide](https://docs.zata.ai/manage/access-keys/creating-a-new-access-key).
REST Endpoint to follow these click on [links](https://docs.zata.ai/manage/service-urls-for-zata.ai-s3).
Now open the Cyberduck.
Click on the Open connection to add the new account.
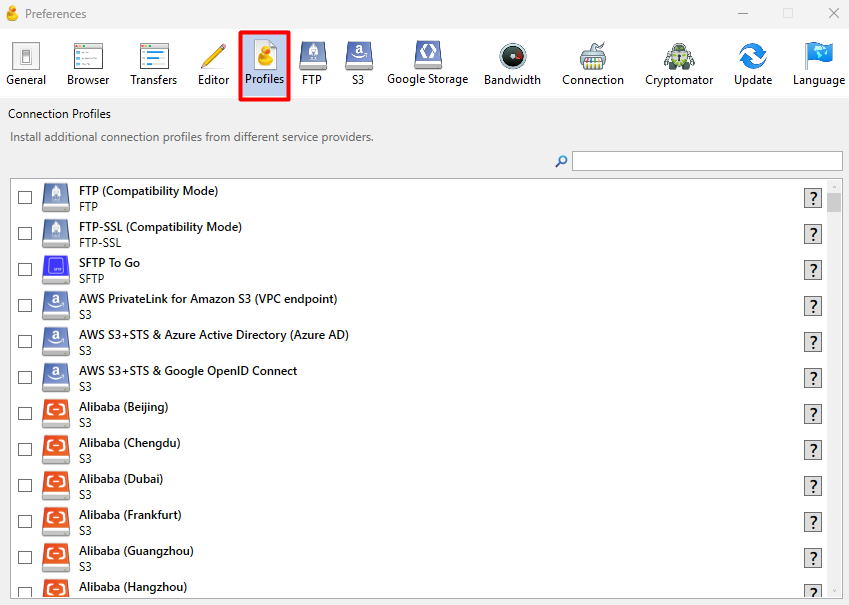
Click on the option, select the S3-compatible storage, and click on the more option.
After these, search the S3-Compatible storage and choose the option.
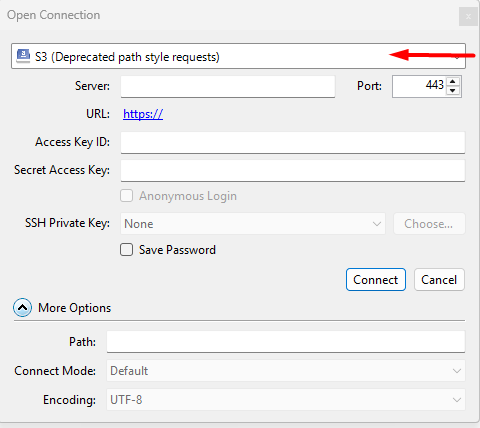
Choose the S3(Deprecated path style requests)
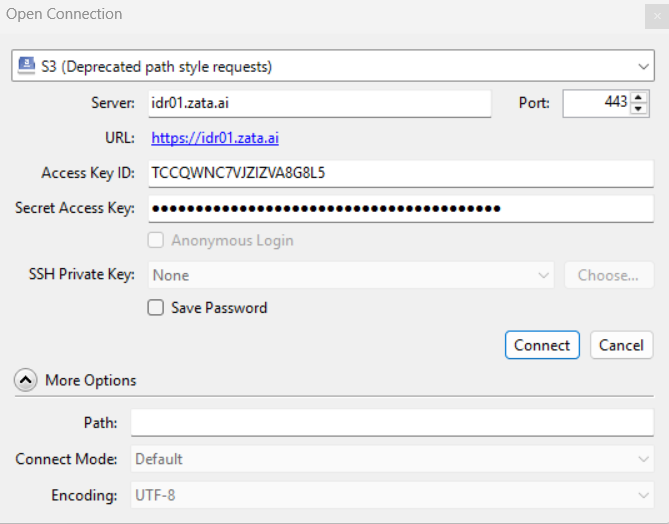
After these now back to the main console the add some details about the S3 account.
Set the Server :- [REST the Endpoint](https://docs.zata.ai/manage/service-urls-for-zata.ai-s3)
Access\_key: Access key that you created above.
Secret\_key:- The secret key that you created above.
Click on the connect.
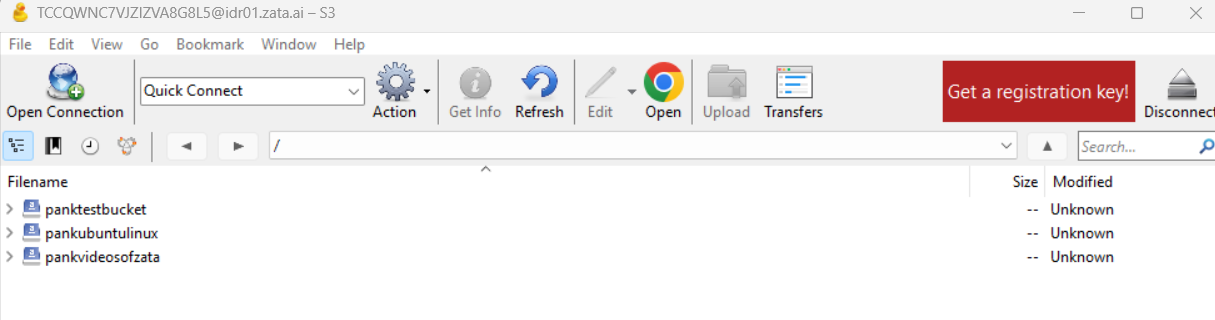
Let's see the bucket is visible that we created in the Zata.ai bucket section.
Now click on the upload option and upload the file. Alternatively, you can simply drag and drop it.
Lets see the data has been transferred from the local system to the bucket.
Navigate to the Zata.ai dashboard, select the Object storage section, choose the bucket, and check the data.